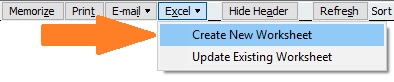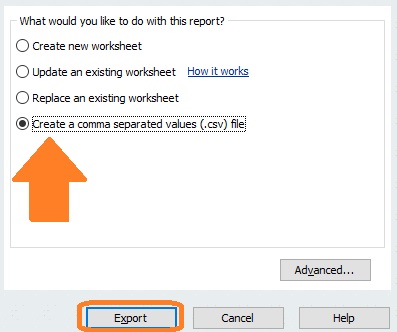
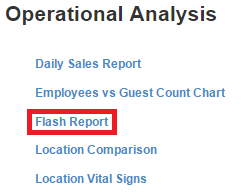
The Flash Report gives users a consolidated report that provides several key metrics for each of their Locations, including Sales, Labor Costs, Discounts and Comps. The Flash Report is located in the ‘Operational Analysis’ section of ‘My Reports’, and is titled ‘Flash Report’. Similarly to all reports located in ‘My Reports’, the ‘Flash Report’ can be ran manually.
Additionally, Flash Reports can be delivered automatically, in a daily email. To set up Daily Flash Report emails, please contact Restaurant365 Support and provide the following information:
- Restaurant365 URL (https://groupname.restaurant365.net)
- All recipient email addresses
Flash Report Detail Explanation
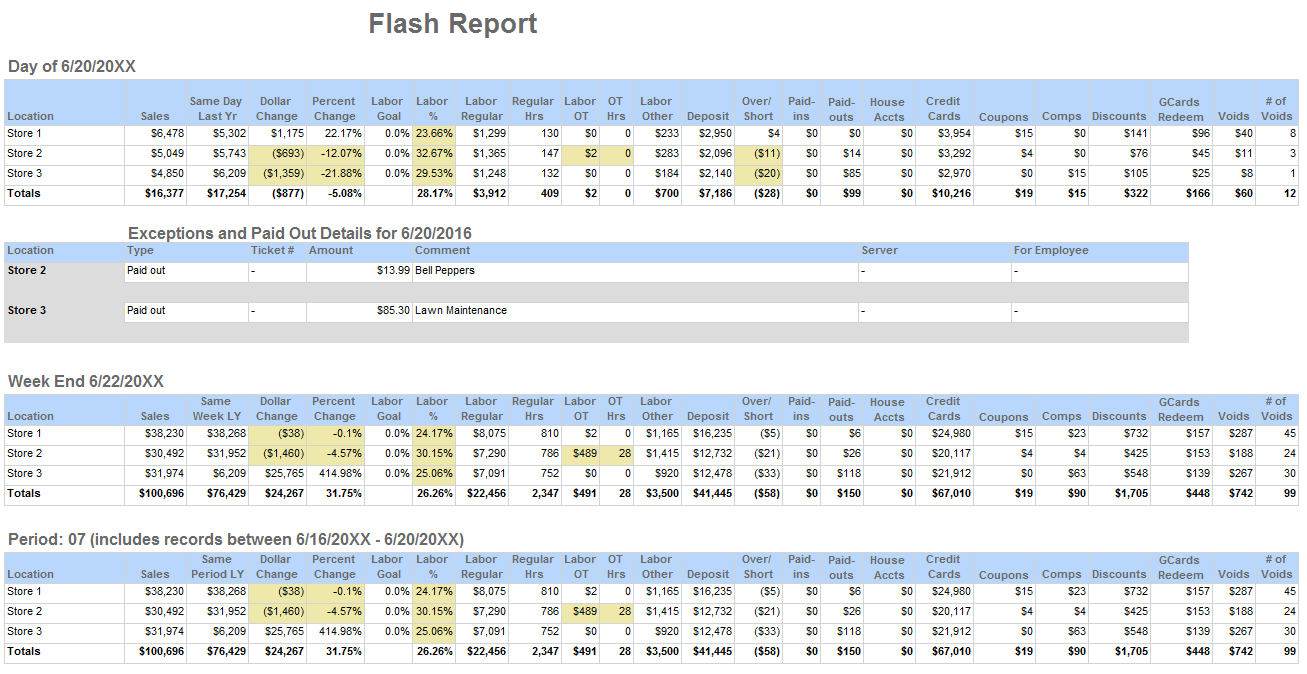
The Flash Report has four different sections: Day, Exceptions/Paid Out Details for the Day, Week End, and Period. Identical columns are present in the three main sections, while Paid Outs and flagged Exception Types appear in a list in the Exceptions/Paid Out Details section. Data in the different sections will reflect the respective section type (Day = Daily data, Week End = Aggregated Weekly data, Period = Aggregated Period data)
Day, Week End, and Period

Legend:
1) Location: This is the Location name in Restaurant365
2) Sales: The sales for the Location
3) Same Day Last Yr: Sales for the same calendar day, from the prior year. Click here for more information on Historical Sales
4) Dollar Change: The dollar difference between ‘Sales’ and ‘Same Day Last Yr’
5) Percent Change: The percent change between ‘Sales’ and ‘Same Day Last Yr’
6) Labor Goal:
7) Labor %: Total labor costs (Labor Regular + Labor Other) as a percent of Sales
8) Labor Regular: Total cost for regular labor recorded through the POS system
9) Regular Hrs: Regular labor hours recorded through the POS system
10) Labor OT: Total cost for OT labor recorded through the POS system
11) OT Hrs: OT labor hours recorded through the POS system
12) Labor Other: Daily Manager Salary Estimate (this value can be manually adjusted on the Location Record)
13) Deposit: The deposit amount from the DSS
14) Over/Short: The over/short amount from the DSS
15) Paid-ins: Total dollar amount of Paid Ins recorded on the POS system
16) Paid-outs: Total dollar amount of Paid Outs recorded on the POS system
17) House Accts: Total dollar amount of House Account Transactions recorded in the POS system
18) Credit Cards: Total dollar amount of Credit Card sales recorded in the POS system
19) Coupons: Total dollar amount of Coupons recorded in the POS system
20) Comps: Total dollar amount of Comps recorded in the POS system
21) Discounts: Total dollar amount of Discounts recorded in the POS system
22) GCards Redeemed: Total dollar amount of Gift Cards Redeemed recorded in the POS system
23) Voids: Total dollar amount of Voids recorded in the POS system
24) # of Voids: Quantity of Voids recorded in the POS System
Exceptions/Paid Out Details for the Day

Legend:
1) Location: This is the Location name in Restaurant365
2) Type: The Type for the line item in the Exceptions/Paid Out list. This will be ‘Exception’, or ‘Paid out’
3) Ticket #: If the Type = Exception, the respective Ticket # will be displayed here
4) Amount: The dollar of the Paid Out or Exception
5) Comment: The comment entered in to the POS for the Paid Out (description), or the default Exception Comment from the Payment Type
6) Server: The name of the Employee / Server that was associated with the Exception Sales Ticket (if relationship exists in the POS)
7) For Employee: Employee name that recorded the Exception Payment Type