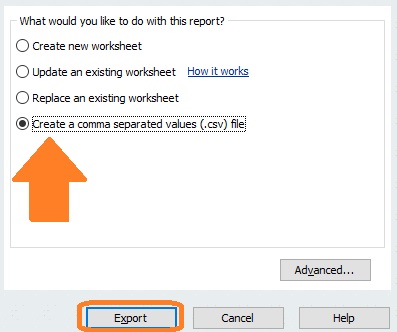
The To Do Checklist is found in the left hand navigation under Accounting – Report – To Do Checklist. This list displays various tabs with items that the system has flagged as requiring setup or attention. If nothing is requiring attention on a specific tab, that tab won’t be displayed. The To Do List has the following tabs:
- Record Setup – this tab shows a row for each record in the system missing required fields. For example if a GL Account was missing GL Type then there would be a row for that account and the row would have a comment stating the account is missing GL Type. Double click the row to open it and add the GL Type. When the list is refreshed that row will be removed
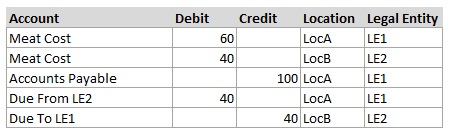
- System Setup – this displays if any legal entity in the system has a discrepancy in beginning balances such as the open AP transactions entered at go live don’t equal the AP gl account beginning balance. AR balance is another example of a discrepancy that might show in this tab. Click here for more detail on how to correct these discrepancies.
- Sales Accounts – this displays Sales Account records imported from the POS that need GL acounts assigned
- Payment Type Accounts – this displays Payment Type Account records imported from the POS that need GL accounts assigned
- Job Titles – this displays Job Titles imported from the POS that need GL accounts assigned
Additional instructions for using the window for Payment Type Accounts, Sales Accounts, and Job Titles is listed below.
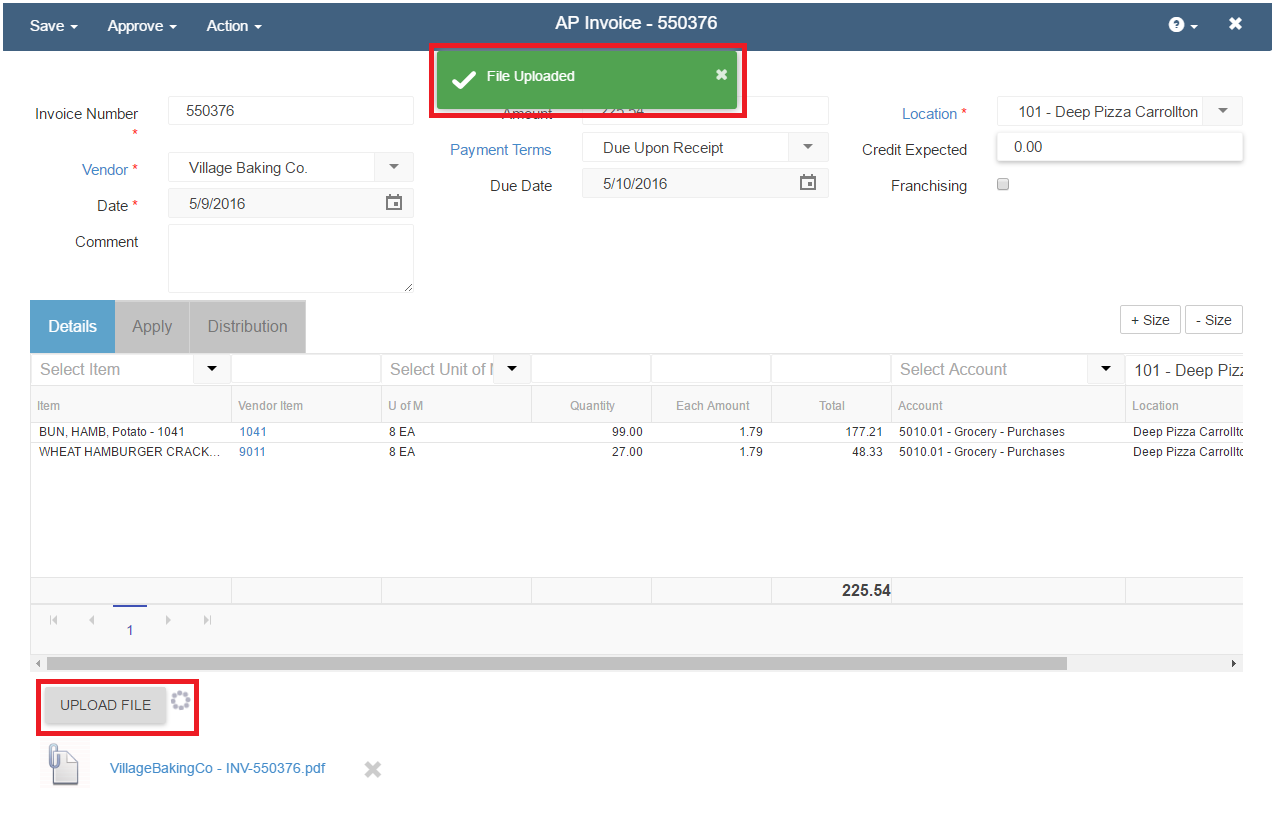
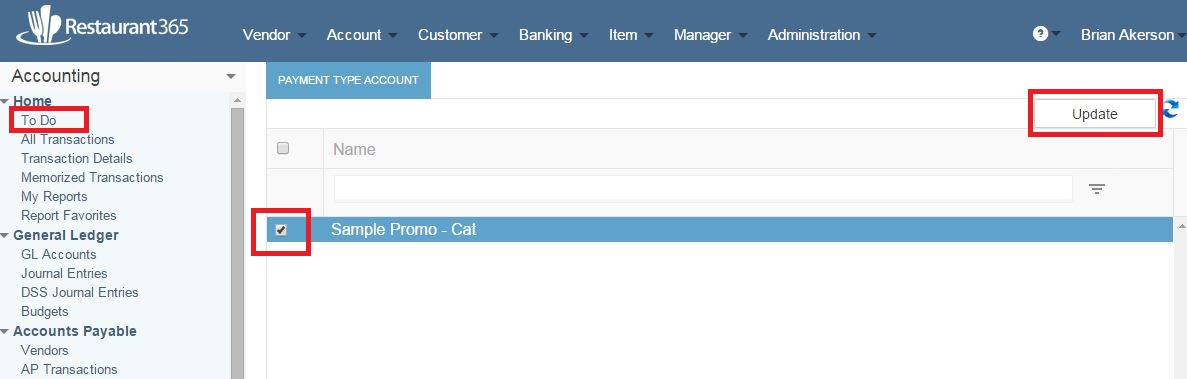
Payment Type Accounts
To assign a GL Account to an item, check the box next to the item name and then select ‘Update’
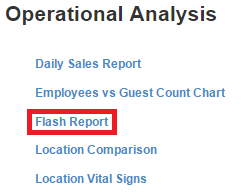
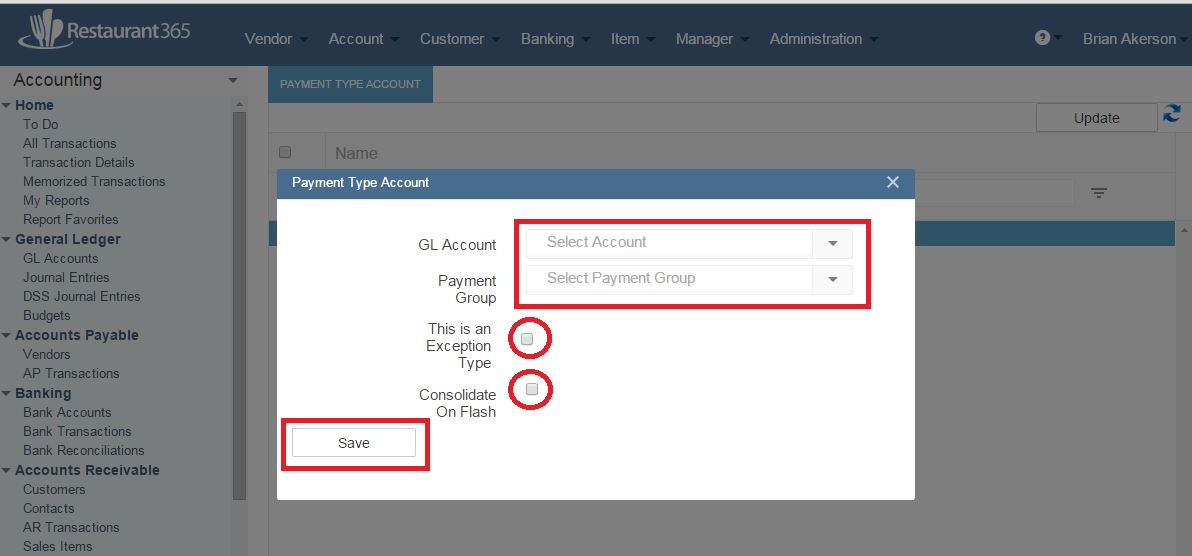
A new Pop-up will appear. For Payment Types – Select the GL Account and Payment Group. If you want the item to be an exception on the DSS, check the ‘This is an Exception Type’ check box. You may also have the payment type cosolidated on the Flash Report, check the ‘Consolidate on Flash’ check box. Select save to save the update. Repeat these steps for each payment Type that needs to be assigned.
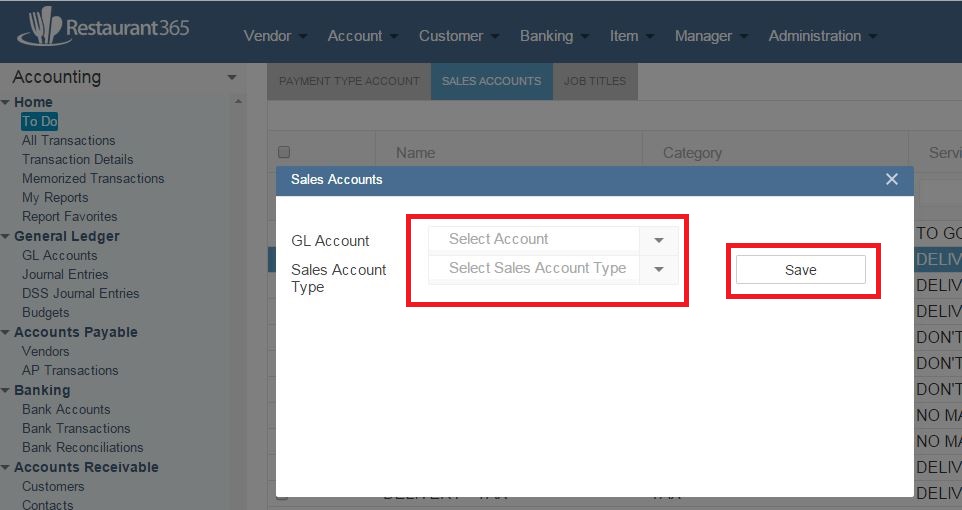
Sales Accounts
For Sales Accounts – Assign the GL Account and Sales Account Type
Job Titles
For Job Titles – Assign the GL Account